We felt that the plinth wall (i.e. this is the wall below the ground level) was probably a lot more important than a lot of the reading/literature suggests, especially if it’s in a tropical area prone to heavy rainfall. These first two or three courses act as a barrier to water which may up-rise and destroy the wall, and thus the structure.

The first two courses of the plinth were laid with gravel packed in the bag. We double-bagged so as to give plinth wall additional strength. After these two courses, we used one course of sand-filled bags to where the floor level would be. From this point we switched to predominantly earth bags. It’s important to remember that when laying the bag, barbed wire should be used by placing it on the first course laid down; this is laid in two rows/lines with a spacing of approximately 150mm. The barbed wire is laid in order to provide a bond between alternate courses.

The courses up to 500mm above grade were encased chicken mesh in order to provide proper bonding of plaster for the cement stucco splashback.

It is ABSOLUTELY CRITICAL that a system is used to make sure that all bags have the same volume. We achieved this by knocking the bottom out of a 15-litre bucket and filling it up twice for each and every bag.

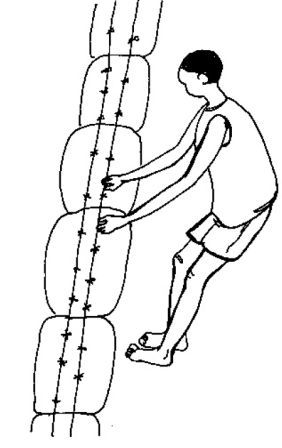
When laying the bag over a barbed wire section, one has to use a metal slider to enable the bag be placed in a proper position. Bags should be tightly placed with minimal gaps between the bags (NB. this is more difficult with a round wall). The bag is then tamped with the tamping rod and then the slider is swiftly removed.


No comments:
Post a Comment